Stripe Payment Links and Custom Parameters
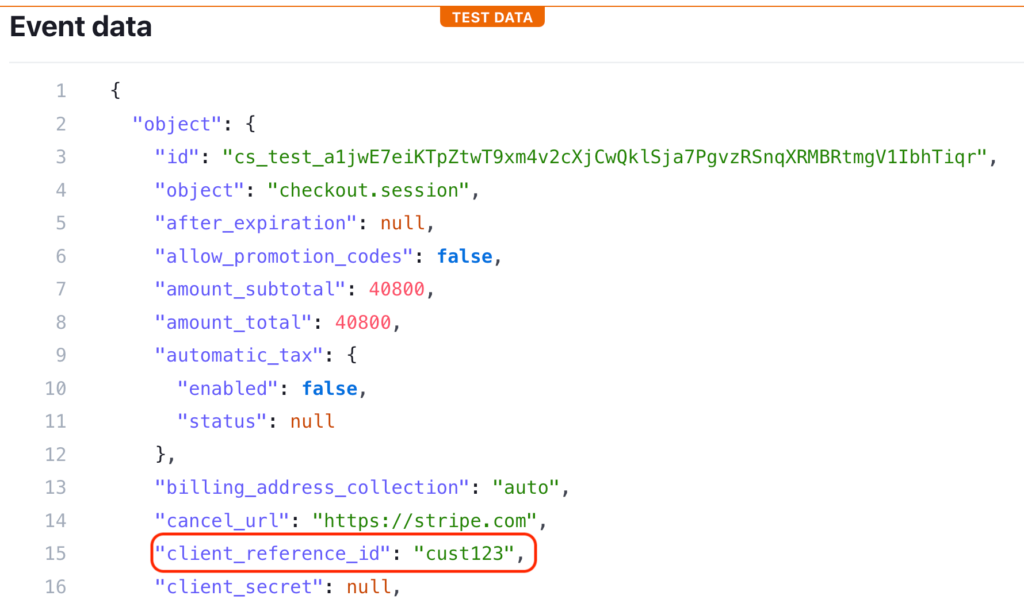
As of now, Stripe’s Payment Links don’t offer the flexibility of adding custom fields beyond those available in the API. The fields that you can directly pass into the Payment Links endpoint are complementary identifiers like prefilled_email or client_reference_id. This post shows some of the workarounds you can use to enrich your payment links with additional custom parameters.
Stripe’s API takes a pragmatic approach and provides two incredibly useful parameters ouf of the box. Both of these are tailored to identify the customer in your system.
- customer_reference_id – A unique string that represents a customer in your system.
- prefilled_email – You can fill in an email that identifies a customer in your system. Just bear in mind, that the customer has access to this field and is able to modify it.
Table of Contents
- Customer Identification: The Blessing of a Hidden Field
- When You Need More .. and Are Happy to Code!
- Summary
Customer Identification: The Blessing of a Hidden Field
When it comes to a simple matter of resolving who made a purchase, customer_reference_id is indispensable. You can simply inject a customer ID stored in your system and share the payment link with your client.
This additional parameter is never accessible during the checkout. Meaning, it can’t be modified by hand. Once the checkout session completes, Stripe passes the value you’ve initially provided in the checkout.session.completed event, which you can easily intercept via a webhook.
Tip: Check my previous post on efficient handling of webhooks.

When You Need More .. and Are Happy to Code!
Although you can’t add custom fields onto the Payment Link itself, you can add additional data to the Customer object. If you are in control of the customer’s creation, that is! This sadly means you can no longer rely on the default, no-code, checkout page hosted by Stripe. However, if you are happy to sport your own checkout page, Stripe rewards you with an additional layer of flexibility via their SDK.
For example, assuming the checkout is available to registered users in your system, you can easily link the user to the Stripe’s customer object by passing additional metadata.
Stripe.apiKey = "sk_test_XXXXX";

// Fetch the user's ID from the security context of your backend
String userId = "ID of the logged in user"

// Turn the user into a new customer in Stripe
Map<String, String> metadataParams = new HashMap<>();
metadataParams.put("user_id", userId);

Map<String, Object> params = new HashMap<>();
params.put("metadata", metadataParams);

Customer customer = Customer.create(params);
Credit: Stripe
Next, you take a complete control over the creation of a checkout session, passing a reference to the Customer you’ve just registered in Stripe.
Stripe.apiKey = "sk_test_XXXXX";

// Take the Customer object from the previous step and pass the customer ID as metadata
Map<String, String> metadata = new HashMap<>();
metadata.put("customer_id", customer.id);

// Attach metadata to the purchased product
ProductData productData = SessionCreateParams.LineItem.PriceData.ProductData.builder()
                             .setMetadata(metadata)
                             .build();
// Define the product price, passing the metadata
PriceData priceData = SessionCreateParams.LineItem.PriceData.builder()
                         .setCurrency("usd")
                         .setUnitAmount(2000L) // $20.00
                         .setProductData(productData)
                         .build()
// Add the purchased item
LineItem lineItem = SessionCreateParams.LineItem.builder()
                       .setQuantity(1L)
                       .setPriceData(priceData)
                       .build()
// Take it to the checkout
SessionCreateParams params = SessionCreateParams.builder()
    // Set parameters
    .setPaymentMethodTypes(SessionCreateParams.PaymentMethodType.CARD)
    .setMode(SessionCreateParams.Mode.PAYMENT)

    // Add the line item
    .addLineItem(lineItem)

// Create the checkout session
Session session = Session.create(params.build());

// This is your payment link containing the custom metadata
session.getUrl();
Summary
In this post, we’ve explored two different approaches to passing custom metadata to payment links in Stripe. Initially, we discussed the convenience of using Stripe’s default checkout page, despite its limitations. Even in this simplified scenario, transactions can be reliably attributed to a user registered in your system.
However, if you need greater flexibility, it’s preferable to have complete control over the checkout session. By doing so, you can proactively register users as customers in Stripe and pass as many custom parameters as necessary. This information will loop back to you via a webhook, once the checkout completes.
For tips on reliable webhook processing and verification, please refer to my previous post.


